Why We Love This Tutorial:
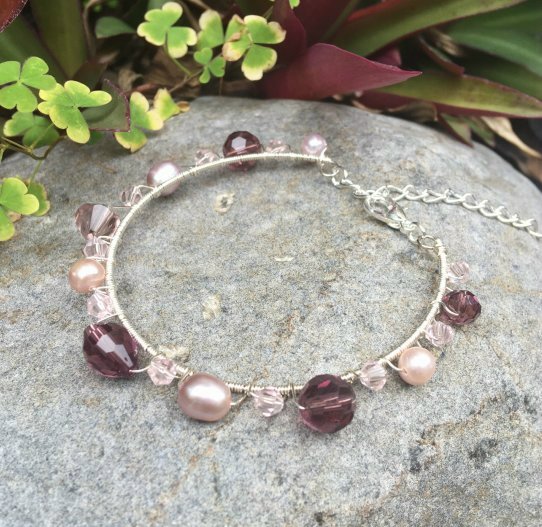
This bangle is a hybrid between a memory wire bangle and a bracelet. The memory wire helps it to keep its shape, while adding a clasp and extension chain means you have flexibility with sizing (plus it looks cute, right?). We’ve used tarnish resistant wire, which means these lovely bangles will hold up against the test of time.
We’ve used some of our new freshwater pearls in smaller sizes (5mm to 7mm), plus a mixture of crystal beads. We’ve actually mostly used one of our crystal mixes (subject to availability) which means we get a nice assortment without having to buy many different strands of crystals.
Beads and Materials You’ll Need:
- Assorted smaller freshwater pearls – between 4mm and 7mm (we’ve used lilac rice freshwater pearls, and potato freshwater pearls. As always, our selection of freshwater pearls in constantly changing so if these pearls are no longer available, please choose something similar!).
- 4mm Crystal Bicone Beads – or any 4mm bead you like (we’ve used 4mm crystal bicones in apricot).
- Assorted crystal beads (between 6mm and 8mm). We’ve used on of our mixed crystal packs in mauve/pink.
- 24 or 26ga non tarnish wire – Artistic Wire or Craft wire are4 both fine for this. (We’ve used 26ga Craft Wire)
- Memory Wire
- Clasp (we’ve used a 12mm lobster clasp)
- 4mm Jump Rings (we’ve used silver tone 4mm jump rings)
- Small piece of chain as an extension chain – any fairly fine chain, about 5mm or 6mm will work fine.
Tools You’ll Need:
- Flat Nose pliers
- Round Nose Pliers (the link here is for our three in one pliers. They contain the round nose tips and they are absolutely my favourite pliers!).
- Flush Cutters
- Memory wire cutters (or very cheap side cutters that you’re happy to damage with memory wire!)
Method:
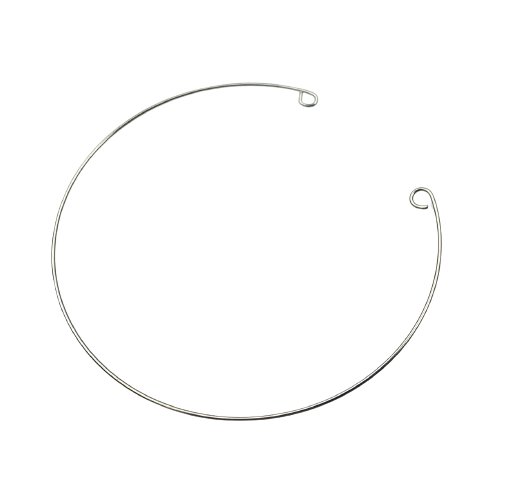
Step One: Cut one loop of memory wire, and roll the ends leaving about a 2cm gap between the two ends.
Step two: Take about 1.5 metres of 26ga wire and begin wrapping the entire length of the bangle. You don’t have to do this step – but the finished product does look nice! You may need slightly more or less wire depending on how tight your wraps are. There is no problem joining more wire on if you run out – just neatly trim the last wrap and recommence wrapping. Once you have wrapped the entire way around, trim off the tails using flush cutters.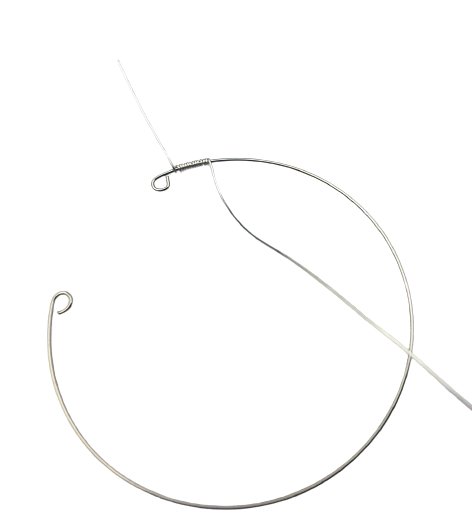 Step Three: Take another piece of 26ga wire about 1 metre long. Wrap a couple of times towards the end of the bangle to secure it in place.
 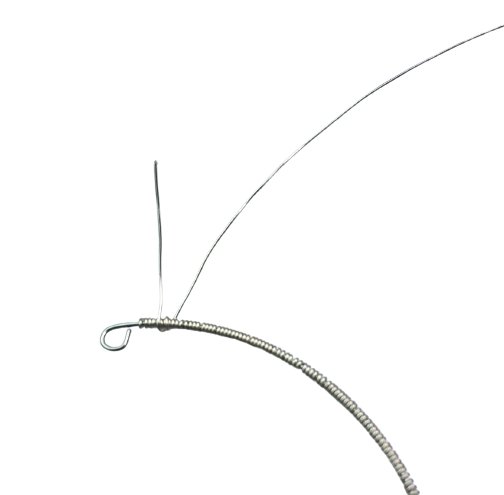 Step Four: Slide on your first bead, starting with one of the 4mm bicones.
 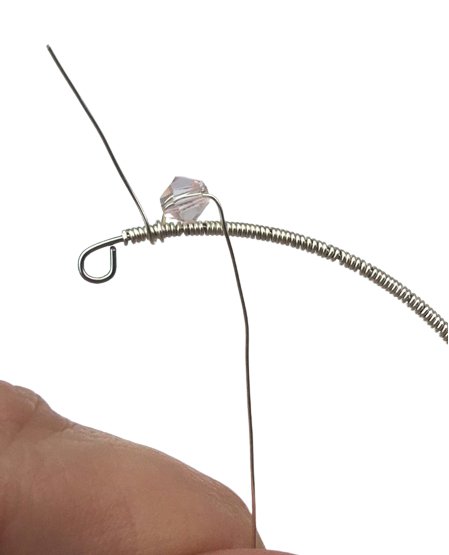 Step Five: Wrap around the bangle frame twice to secure the bead in place.
 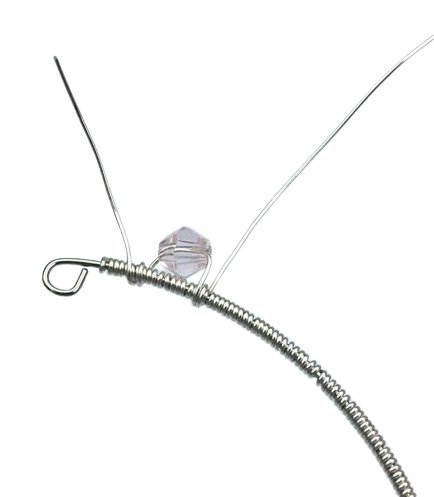 Step Six: Even though the beads are a bit of a random mix, we have made a pattern of sorts; every second bead is a 4mm bicone. And the pearls/crystals alternate to form a balanced looking bracelet.
 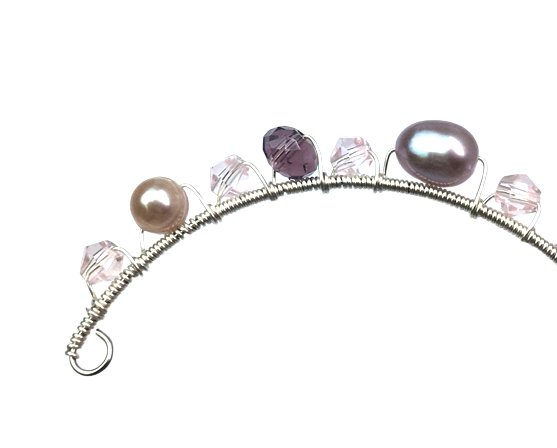 Step Seven: After you have completely wrapped your beads around the bangle, wrap a few more times and trim the tails using flush cutters. Then, using 4mm jump rings, attach a lobster clasp to one of the loops and a small section of chain (about 4cm) to the other loop.
 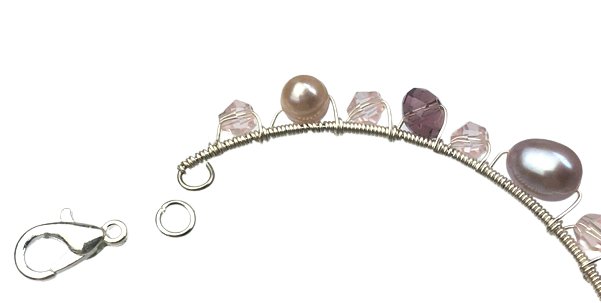 After attaching:
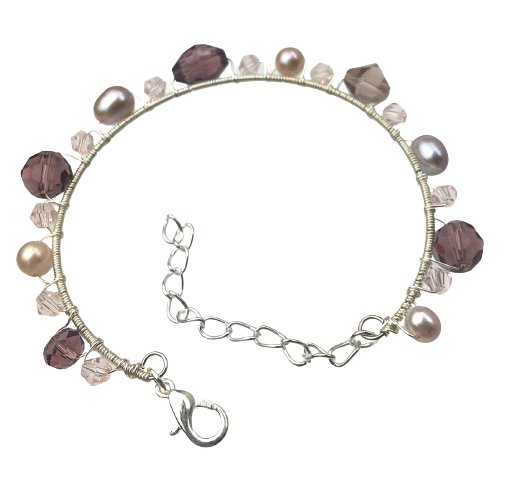
And that’s it! You’re done! 🙂