Why We Love This Tutorial:
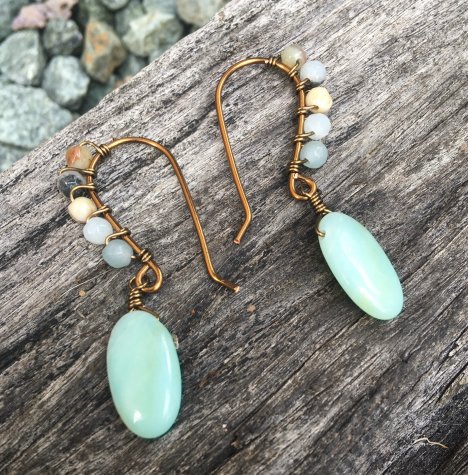
These earrings are made completely from scratch – using just wire and beads! They are quite easy to make, too, taking about 30 minutes per earring. Using the Artistic Wire, the earrings are strong and tarnish-resistant. Gotta love that!
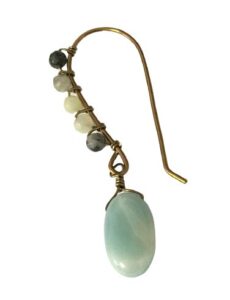
We’ve used some of our pretty new natural Amazonite beads for these earrings, with the antique brass coloured Artistic wire. Of course you could use any type of bead you like, and any colour wire. There’s so much creative freedom with these pretty earrings 🙂
*Note on the drop bead: Top drilled beads are a little more difficult to come by than a standard through-drilled. So if you have a through-drilled bead you’d like to use for the drop, simply change out the wire and use a headpin for the drop.
Beads and Materials You’ll Need:
- 4mm round beads (we’ve used 4mm faceted round Amazonite beads)
- Top drilled bead (we’ve used a top drilled Amazonite nugget. These beads are fairly irregular, so you’ll have to go through your strand to find two matching beads). *See our note on the drop bead above.
- 18ga wire (we’ve used Antique Brass Artistic Wire 18ga)
- 24ga or 26ga wire (we’ve used Antique Brass Artistic Wire 24ga)
Tools You’ll Need:
- Flat Nose pliers
- Round Nose Pliers
- Flush Cutters
- 14mm round mandrel. Or, a thick pen/marker will work!
- Wire rounder (optional but recommended!)
Method:
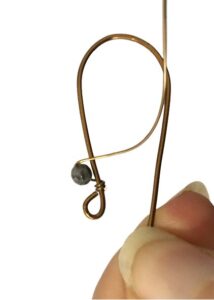
Step One: Firstly, we are going to make the basic earring hook. Cut approximately 10cm of 18ga wire. Take your 14mm mandrel (or thick pen… or what ever you have lying around that you can bend the wire over!). Bend the wire over the mandrel at the half way point.
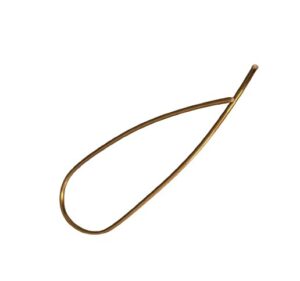
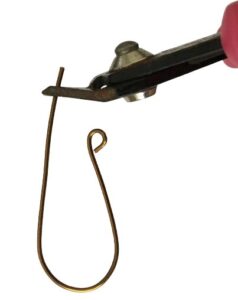
Step Two: Using round nose pliers, form a loop on one side of the earring.
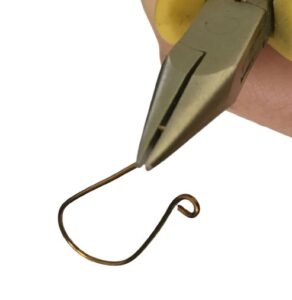
Step Three: Using flat nose pliers, slightly bend back the end on the other side of the earring. You may need to trim it a little first using flush cutters to get the proportions correct.
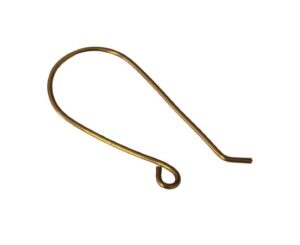
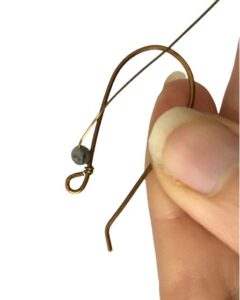
The finished earring hook:
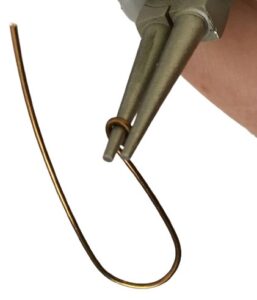
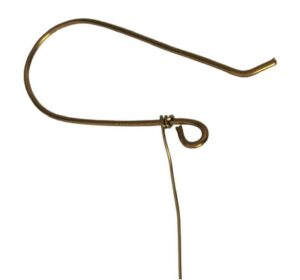
Step Four: Take about 20cm of 24ga wire, and wrap approx. 3 times round the base of the earwire. Trim the small tail off at the bottom using flush cutters.
Step Five: Add a 4mm bead, and continue to wrap around the frame.
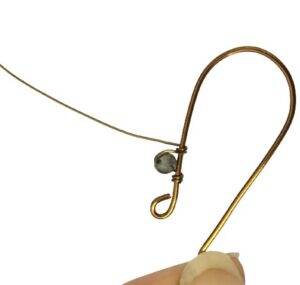
Step Six: Wrap twice between each bead, and continue adding beads. Once you have added as many beads as you like (we used 5), wrap three times at the top then trim with your flush cutters.

Step Seven: Now it is time to make the drop. Cut a piece of wire about 15cm (this is more than you’ll need, but it makes it easier to work with). Take your top drilled bead, and thread in the 24ga wire. Bring the two ends of the wire together at the top of the bead and pinch in using your fingers. Cut one end of the wire, leaving a small tail of about 3mm.
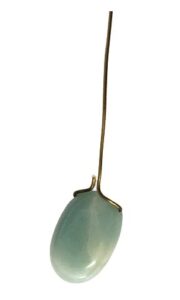
Step Eight: Using round nose pliers, make a wrapped loop around the wire and 3mm wire. Then trim the tail using flush cutters.

Step Nine: Open the loop on the bottom of your earring, and slide on the drop.

Step Ten: Close the loop using flat nose pliers. To make the end of the earrings smoother and more comfortable when inserting into the ear, we recommended using a wire rounder. This will round off the sharpness of the cut wire. Or, if you have some fairly fine sand paper, you can smooth it off slightly using that as well.
And, you’re done… well after you make the matching earring that is!