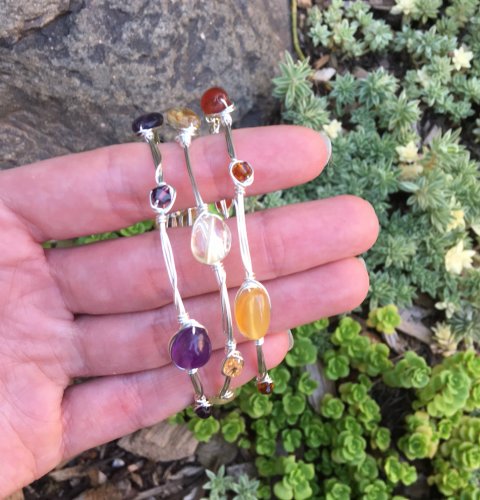
Why We Love This Tutorial:
These pretty bangles are made using just wire and beads, and once you get going are very easy and quite quick to create! We’ve used tarnish resistant wire, which means these lovely bangles will hold up against the test of time.
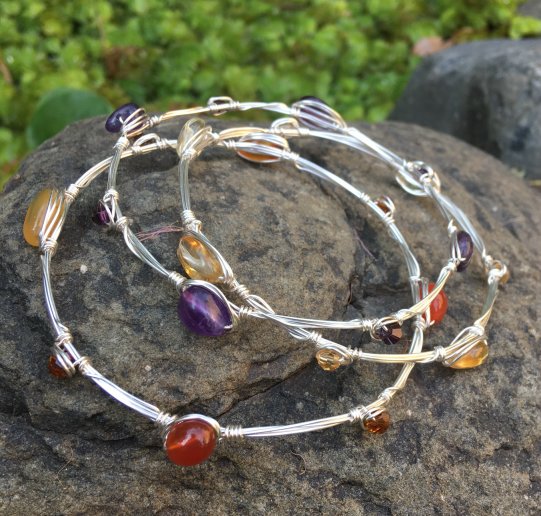
We’ve used some of our very sweet little ‘pebble’ gemstone beads for these bangles, and matched them with small faceted gemstones and/or crystal beads in a complementing colour. We have made the bangles in the past with much larger stones, the key is to try to use beads that are relatively flat. I love to make a few of a similar design in different colours, then stack them up!
Beads and Materials You’ll Need:
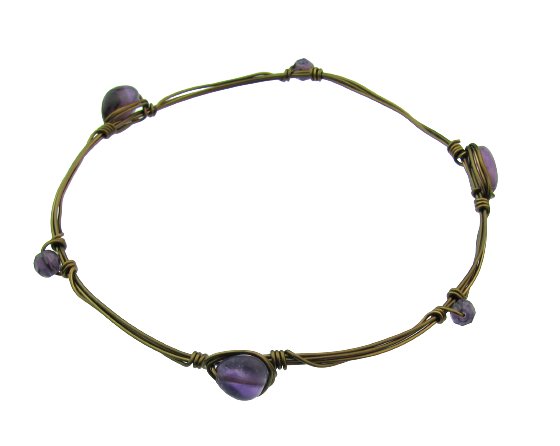
- Gemstone Pebble Beads – we have many different gemstone varieties in this cute little shape now. In this design (main photo) we’ve used Amethyst pebbles, Carnelian pebbles and Citrine pebble beads.
- 4mm faceted gemstone beads – for the matching smaller bead, you really can use anything so long as the colour ties in. We’ve gone for faceted gemstone beads, but we have also made these using crystal rounds or bicones in the past (great to keep the cost down!).
- 22ga Tarnish Resistant Wire* – we’ve used silver in our main photo, and bronze in the tutorial (it shows up better in the photos!)
- *if you are using larger beads, I would suggest moving up to a 20ga or even 18ga wire.
Tools You’ll Need:
- Flat Nose pliers
- Flush Cutters
- Bangle mandrel. We do sell these in store, however due to their very heavy weight and quite large size we do not have these available on our website. If you can not source one locally, please feel free to call us and we can give a quote on the cost of shipping (these are excluded from our free shipping offer). Alternatively, any object that has a round large cylinder shape will work – a drinking cup, perhaps!
Method:
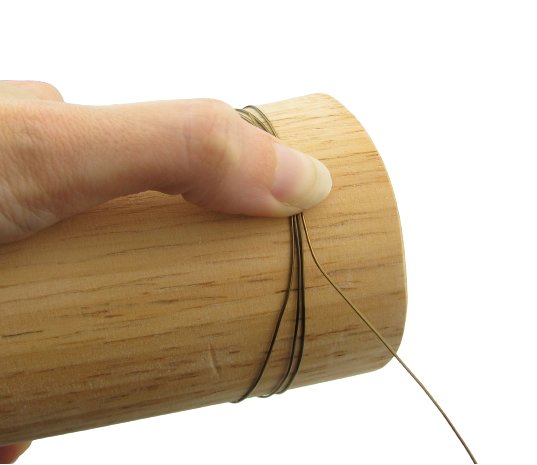
Step One: Cut approximately 1.5 meters of your 22ga wire. Wrap it three times around the bangle mandrel. We have gone quite close to the end of the mandrel to make a relatively large sized bangle.
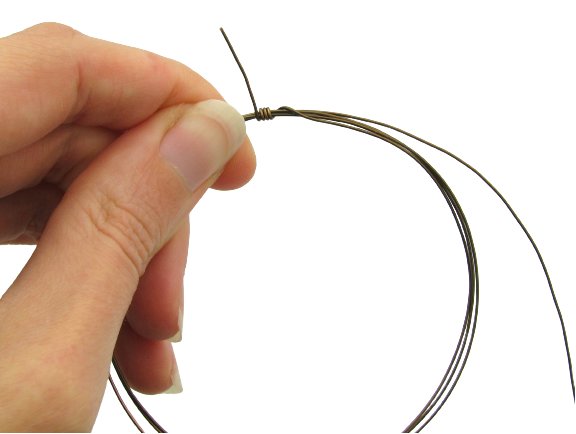
Step Two: Slide the wires off the mandrel, holding them tightly together with your fingers. Separate a small tail of wire and wrap this several times around the three wires.

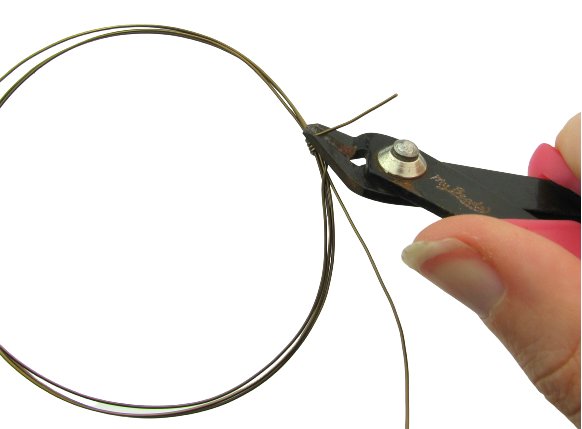
Step Three: Trim the remaining small wire with your flush cutters.
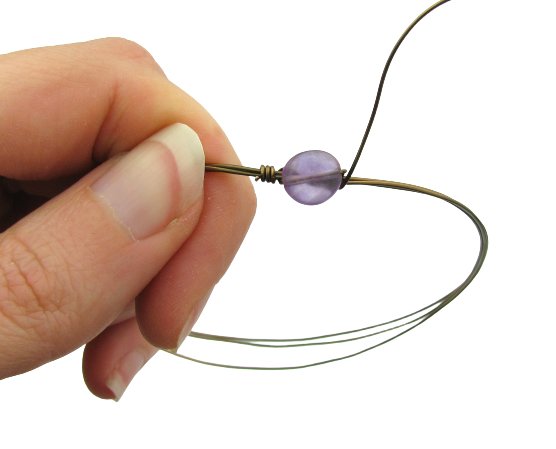
Step Four: Slide on one of your pebble beads.
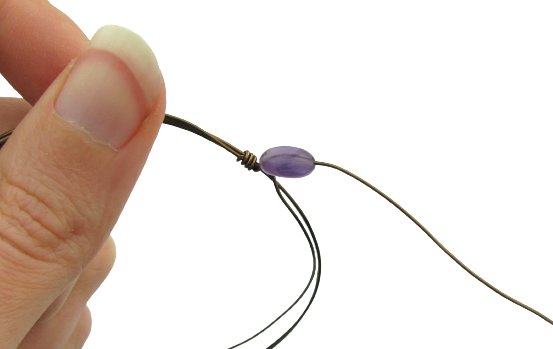
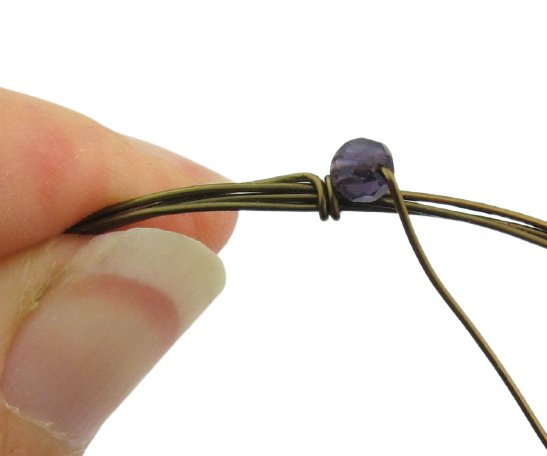
Step Five: Make a single wrap around the bangle base after the bead.
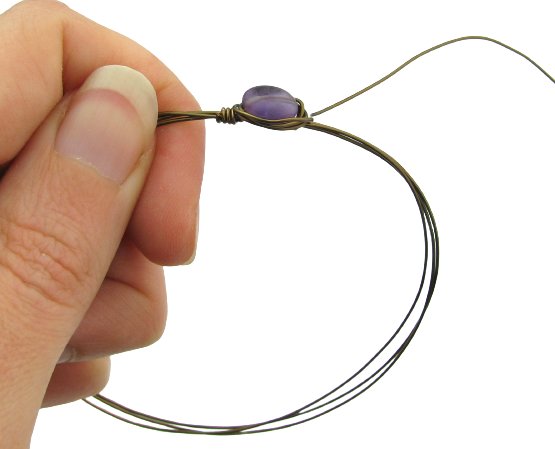
Step Six: Now we wrap around the pebble bead 2-3 times. This step is not essential, but by wrapping around the bead it seems to frame it nicely.

This shot is from the back of the bead, and shows how we have done the wraps:
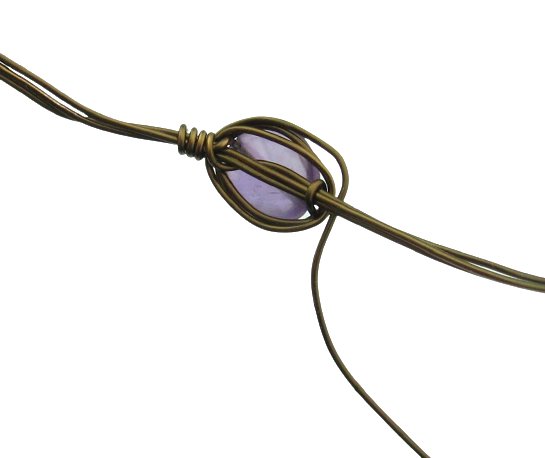
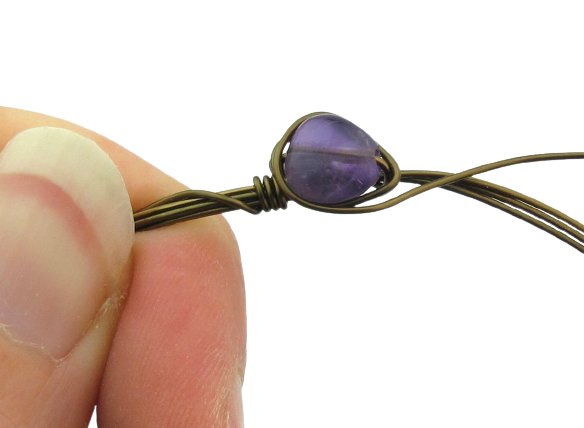
Step Seven: Now make 2-3 wraps around the three wires of the bangle base.
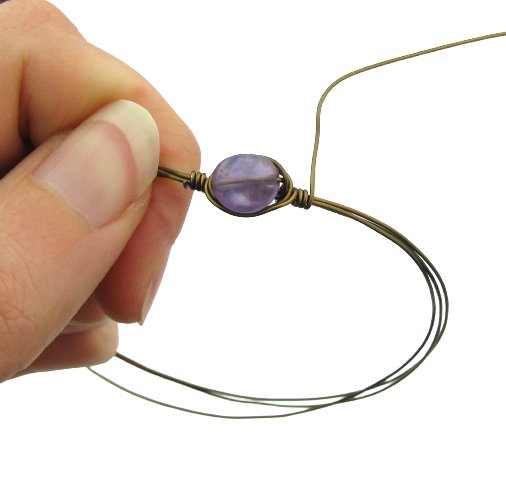
Step Eight: Going under the wires of the bangle base, take the tail wire along approx. 2-3cm (the spacing will depend on the size your bangle and also your desired look). Then wrap 1-2 of times around the bangle base (we have done slightly less wraps when we are using the small 4mm bead, and slightly more wraps when using the pebble).

Step Nine: Slide on your 4mm bead and continue to wrap 1-2 times. We have not wrapped around the 4mm bead in this case, as it is very small and framing it was not necessary.
Step Ten: After you have completely 1-2 wraps after the 4mm bead, take your wire along as we did before to start the next bead. 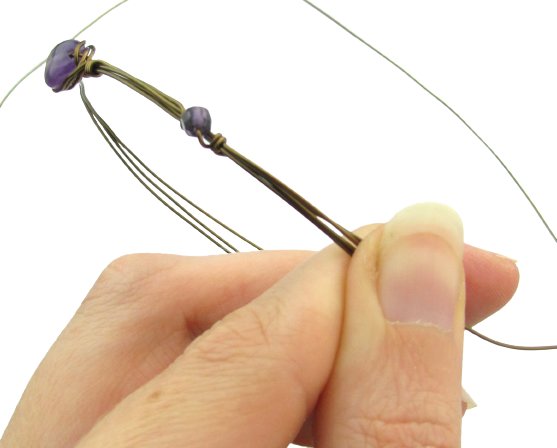
Step Eleven: And continue adding beads in the same manner:
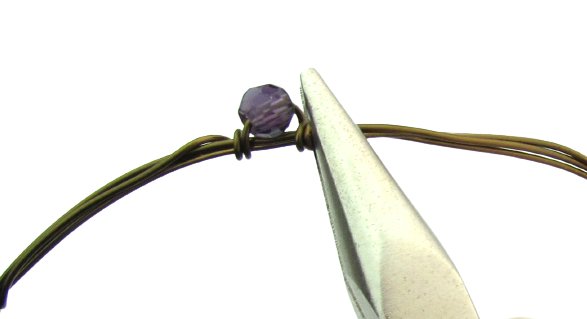
Step Twelve: Once you have added all of your beads, simply trim the remaining small tail with your flush cutters.

Step Thirteen: Using flat nose pliers, make sure the tails that you have trimmed are pushed down and flat against the bangle so that they are not poking out to spike you!
What happens if you run out of wire will completing your bangle?? It is very simple to add more wire. Just trim off the tail of your original wire, and push flat. Then start a new wire by completing a few wraps around the bangle base next to a bead. Then continue on as before!
Step Fourteen: The finished product!