Why We Love This Tutorial:
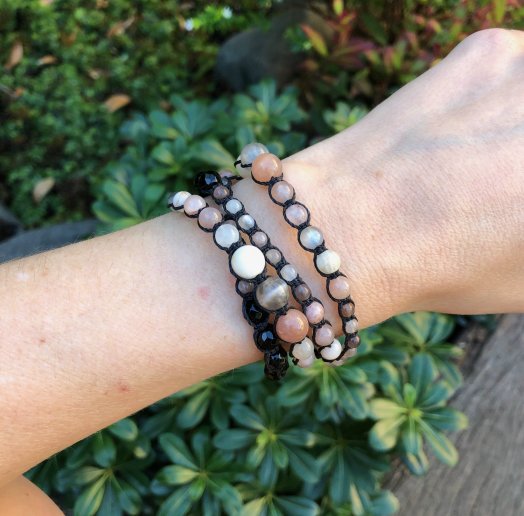
This tutorial is once again using our new 0.65mm waxed cord. The slightly finer cord means threading on beads in macrame is not-so-much of an issue like it is with the 0.8mm cord. This is a wrap bracelet, but to be honest I was not sure if it was going to be a long macrame necklace or a wrap bracelet – but as it turns out, you can definitely wear it both ways!
This bracelet works out to be 68cm long, which wraps around my wrist 4 times (quite loosely). My wrist is fairly small at about 15cm. Please check first how long your bracelet will need to be – you could add/remove some beads for shorter or longer, or simply make the spiral sections at the end slightly longer/shorter.
Beads and Materials You’ll Need:
- 8mm round gemstone beads x 12 (we’ve used Mixed Sunstone & Moonstone round beads 8mm)
- 6mm round gemstone beads x 30 (we’ve used Mixed Sunstone & Moonstone round beads 6mm)
- 4mm round gemstone beads x 42 (we’ve used Mixed Sunstone & Moonstone round beads 4mm)
- 6mm faceted gemstone beads x 10 (we’ve used faceted Black Onyx 6mm round beads)
- Gemstone Pendant (we’ve used a Black Onyx small oval pendant. Please note, our range of pendants changes constantly, so if this pendant is no longer available, please choose something else that will match in! You could also simply use a charm).
- Cord Ends (we’ve used black)
- 2x 4mm or 5mm jump rings (we’ve used black 4mm jump rings)
- 1x 8mm jump ring
- Clasp of your choice (we’ve used a black magnetic clasp)
- approx 4 metres 0.65mm polyester macrame cord (we’ve used black)

Tools You’ll Need:
- Flat Nose pliers (2 pairs)
- Macrame board or clip board
- Scissors
Method:
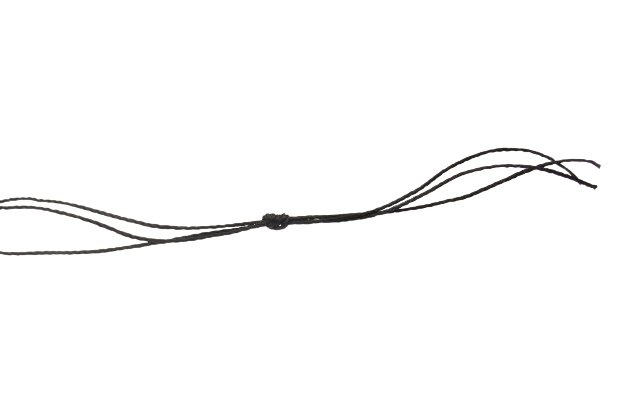
- Cut your cord into three sections. One piece about 80cm long (this is the center string) and two pieces approx. 1.5M long each.
- Tie all three pieces or cord together towards one end (leave a tail of 2-3cm. You’ll cut this off later so don’t lave too much!)
- Secure the knot under the clip on your clipboard.
 I have shot this on a glass background, so I will also include a photo of the clipboard set-up.
- I have started with a series of spiral knots. A spiral knot is basically just a square knot but without changing directions of your knots. (To see these knots in action, I would recommend this video on YouTube by The Flower Art as she demonstrates a variety of basic knots, including the one we are using today!).

- Make about 2cm worth of spiral knots.

- Now it’s time to start adding beads. To save you unclipping and clipping up your clip every time you add a bead, you can add a number of beads at a time. These are all threaded onto the middle string. Re-attach y9ur bulldog clip to secure the middle string in place.

- Slide one bead close to the series of knots.

- Make one knot as you did before after this bead.
 Pull cord tight:
- Now, reverse this knot (so start on the opposite side to what you were doing before).
 Continue:
- Continue adding beads in this manner. You will occasionally have to shift your whole bracelet up under the bulldog clip, and add more beads onto the middle string.

- The pattern of beads is as follows:
- 7x 4mm round
- 5x 6mm round
- 3x 8mm round
- 5x 6mm round
- 7x 4mm round
- 5x faceted 6mm round
- 7x 4mm round
- 5x6mm round
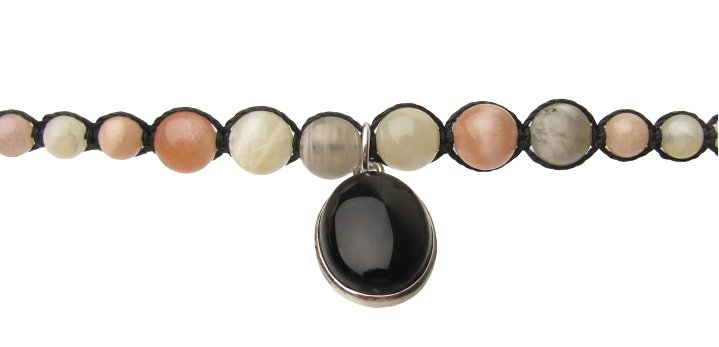
- 6x 8mm round
- 5x 6mm round
- 7x4mm round
- 5x faceted 6mm round
- 7x 4mm round
- 5x 6mm round
- 3x 8mm round
- 5x 6mm round
- 7x 4mm round

- Trim the tail ends off the cord right near the knot. You make like to either burn the knot slightly (as it’s waxed, it will melt), or add a little glue. The photo below is pre-trimmed!

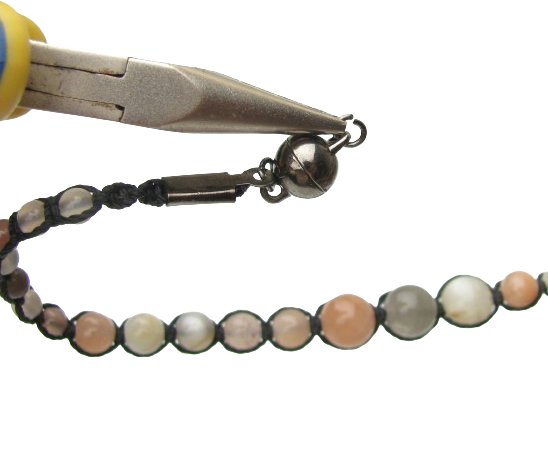
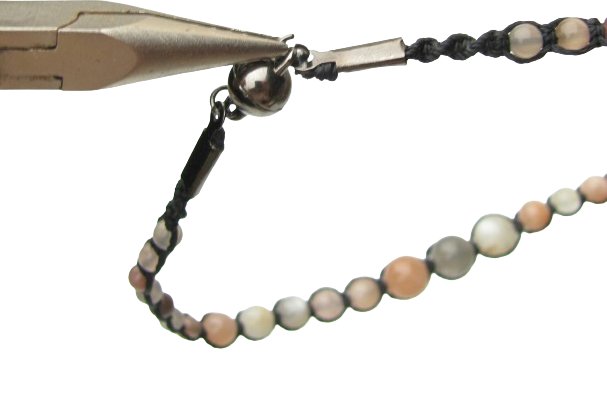
- Use a cord ends to finish the end. Place the knot just outside the edges of the cord end (as per photo).

- Close one side of the cord end, and then the other.

- I have taken the bail (on left) off the pendant and used a 8mm jump ring (on right) instead. It simply sat better this way.

- Attach the pendant in the middle of the section of 6x 8mm round beads. You can actually attach it anywhere you like; I have it so that when the bracelet is done up on my wrist the pendant is towards the back/bottom. But if you want the pendant to sit on top of your wrist you could attach it elsewhere.

- Attach the magnetic clasp to the cord ends using 4mm jump rings.
- And that’s it! Your bracelet/necklace is finished 🙂