Why We Love This Tutorial:
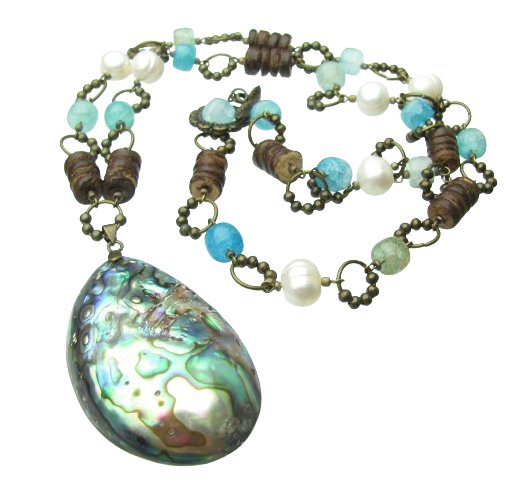
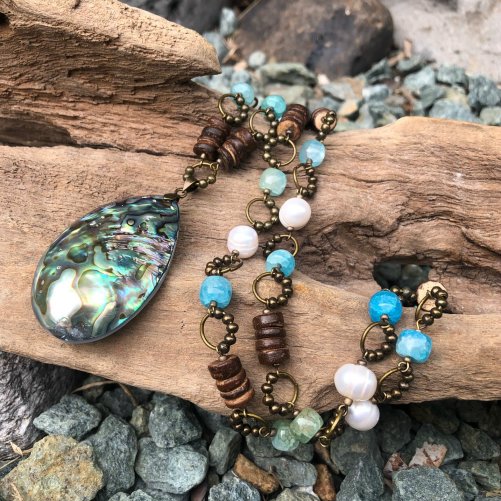
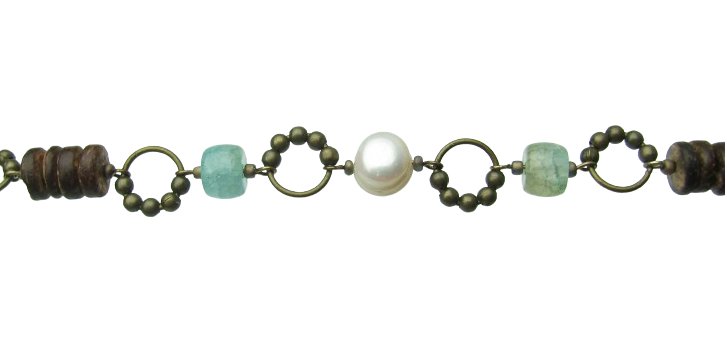
This is a bit of a different spin on a basic chain link necklace design; we’ve used large 10mm jump rings and added small 3mm beads to them to create quite an unusual look. We think the bronze toned findings go so well with our new coconut beads and freshwater pearls, but you could use silver or gold if you prefer!
The finished length of this necklace is approximately 80cm.
Beads and Materials You’ll Need:
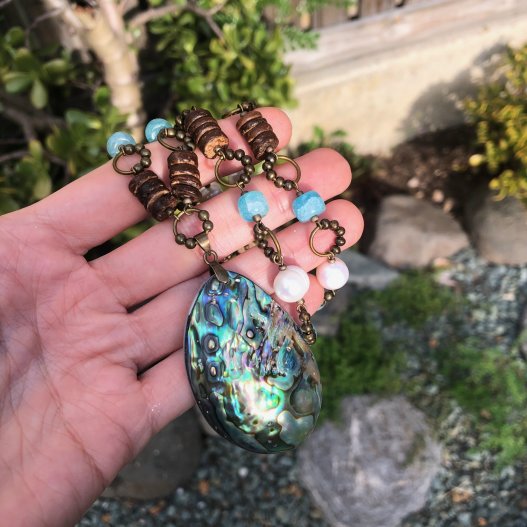
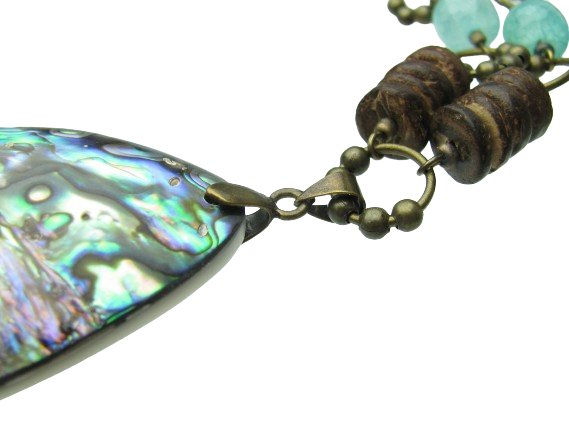
- Large Pendant (we’ve used one of these stunning Abalone Shell Pendants. As always our stock of pendants is constantly changing, so you may need to substitute a different pendant if they are no longer available. I think a Turquoise Pendant or a different shell pendant might work just as well!).
- 32x Coconut Wheel Beads 8mm (one strand is plenty)
- 14x Crackle Glass Wheel Beads (we’ve used these Light Teal but you could use a different colour with a different pendant to shake things up!)
- 6x Chunky Freshwater Pearls (we’ve used these 10-11mm white potato freshwater pearls).
- Size 11/0 seed beads (we’ve used bronze toned seed beads). 2mm bronze metal spacers would work just fine too.
- 3mm Metal Spacers (we’ve used these bronze 3mm round metal spacers)
- 10mm Jump Rings (we’ve used Bronze 10mm jump rings)
- 25mm eyepins (we’ve used bronze eyepins. You’ll have to cut them down to size so any eyepin larger than 25mm will work fine)
- 14mm Pinch Bail (we’ve used these bronze pinch bails)
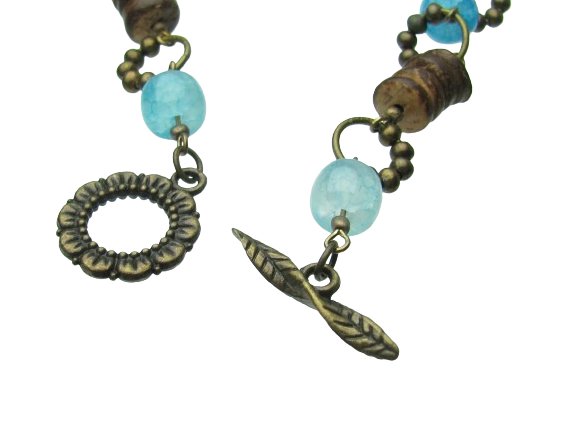
- 5mm jump ring (we’ve used these bronze 5mm jump rings)
- Toggle Clasp of your choice (we’ve used this bronze toggle)
Tools:
Method:
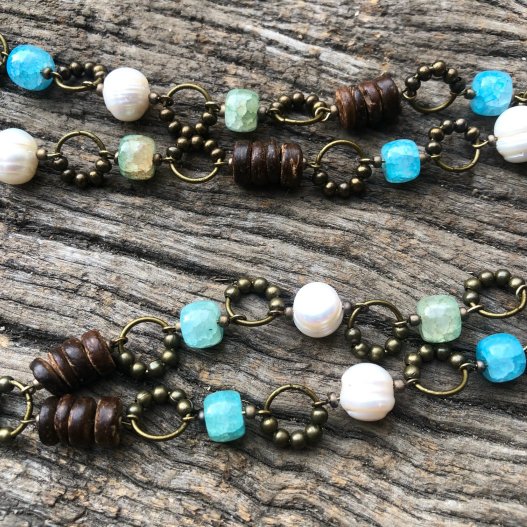
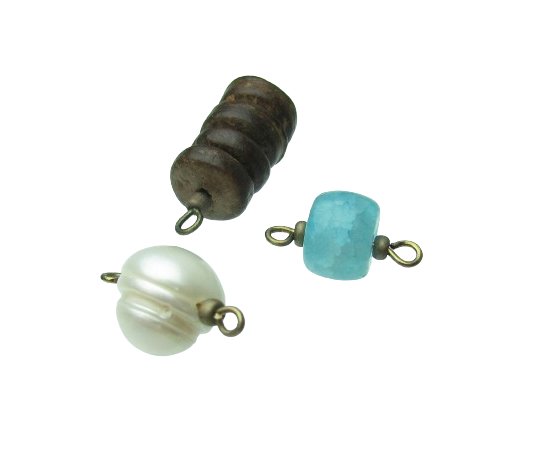
- Start off by making all the beaded links. We have made simple looped-links in this necklace, but you might like to make wrapped loops to make it more secure. But because we’re using eyepins (with one loop already made), we’ll stick to simple loops in this tutorial. Take your eyepin, slide on a size 11/0 seed bead, the bead, then another seed bead. Cut the eyepin leaving about 8mm of wire and form a loop using your round nose pliers. You will need to make:
- 14 blue crackle glass links
- 6 freshwater pearl links
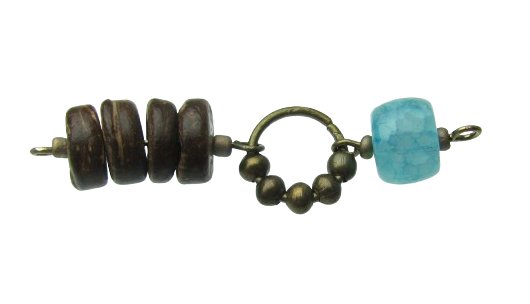
- 8 coconut bead links (the coconut beaded links each use 4 coconut beads)
- Now it is time to join all the links together. We have used 10mm jump rings, each with five 3mm spacer beads on them.
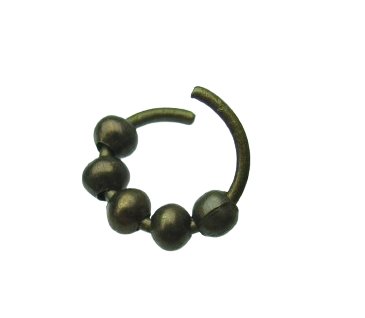
- When connecting two beaded links together, keep the 3mm spacers to one side of the two links. This will create the interesting wave-look that the necklace has.
- The pattern we have used is (starting from the toggle):
- Toggle – crackle – coconut – crackle – pearl – crackle – coconut – crackle – pearl – crackle – coconut – crackle – pearl – crackle – coconut – PENDANT – then the reverse up the other side. See finished necklace photo at the bottom of this tutorial for a visual of the pattern.
- When adding the following 10mm jump ring, make sure that the 3mm beads are to the other side of the beaded links, see the photo below. By alternating the side that the 3mm beads are on, we get the wave-look as mentioned previously.
- When you are at the middle of your necklace, you’ll need to attach your pendant. These pendants do not come with a bail, so we have used a small pinch bail. Simple attach the bail to the pendant, then slide the pendant onto the middle 10mm jump ring. We have still used 3mm spacers on this center jump ring, but they tend to float around each side of the bail so don’t worry too much about positioning the 3mm spacers on this jump ring.
- To finish off, simply attach each side of your toggle clasp to the ends of the necklace using 5mm jump rings.
- The finished necklace!