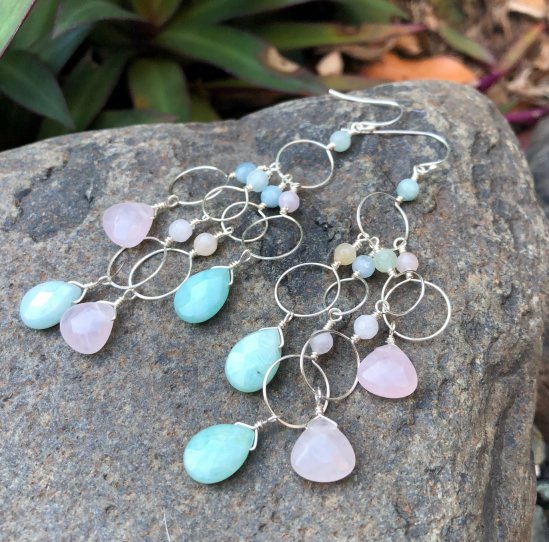
Why We Love This Tutorial:
These are such a pretty and delicate pair of earrings, made using just wire and some of our beautiful new pastel toned gemstone beads (Morganite, Amazonite and Rose Quartz). Quite a few wire wrapped loops in this project, so if you’re not an expert you will be after completing these earrings! We have used the Artistic Wire for these earrings, as we found the soft wires like aluminium or Beadsmith Craft Wire a little more difficult to work with (in this project, the wire being slightly harder/stiffer is a benefit as it makes wrapping the loops just that little bit easier. That’s what we found, anyway!). We have hammered the wired loops after forming them as this hardens up the wire and enables it to keep it’s shape.
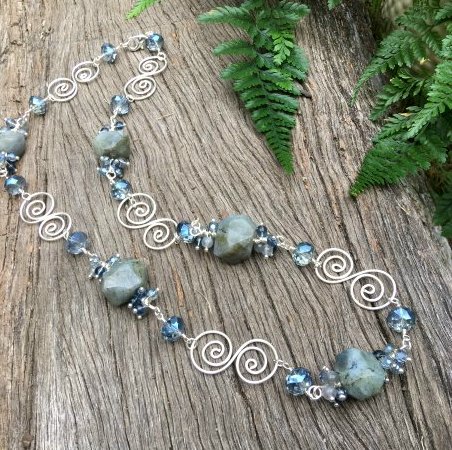
This project, like most of our projects, could be made with any beads or colours that you like. The teardrops are actually completely optional, and you could just leave the wire loops as the bottom of the earrings. Or (as teardrops are a little harder to come by) you could use regular beads on headpins as your bottom layer.
Beads and Materials You’ll Need:
- 4mm Round Faceted Gemstone Beads (we’ve used Morganite beads)
- Small (between 10mm to 14mm) Teardrop Gemstone Beads (we’ve used Amazonite Teardrops and Rose Quartz Teardrops)
- 24ga wire
- Sterling Silver Earwires
Tools You’ll Need:
- Flush Cutters
- Round Nose Pliers
- Flat nose pliers
- Dowel 12mm (or a pen of this diametre… a sharpie seems to be about right!)
- Dowel 8mm (or a pencil of about this diametre)
- Anvil (optional)
- Chasing Hammer (optional)
Method:
-
- Because we are wire wrapping each connection, we will start from the top of these earrings. Cut approx. 10cm of wire (there will be some waste, but it’s easier to work with this amount). Take your larger (12mm) dowel, and form the wire around it.

- Take one end of the wire and wrap 2-3 times around the other:

- Take the loop of the dowel, and trim the tail off the wire that was wrapping around the other:

- Thread on a 4mm round bead.

- Form a wrapped loop using round nose pliers; first form the loop:

- Then, wrap 2-3 times around the stem:

- Trim off the tail using flush cutters, and it should look like this:

- We have hammer just the loop section of each connector in these earrings. This makes it hold it’s shape a little better. Hold just the loop over the anvil, and hammer using your chasing hammer. You don’t need to hammer too much, just enough to harden up the wire.

- The hammered connector (a bit hard to tell but it has been hammered!):

- Now we will make four more connectors to attach to this top connector. We will make two using the 12mm dowel, and two using the 8mm dowel. We have put the two smaller loops in the middle. You will attach each directly onto this top connector using a wrapped loop. These means the earrings are never going to fall apart!

- At this stage you will want to go ahead and lightly hammer each loop that you have just added to the earrings.

- Now make two more loops using the 12mm dowel and attach them to the two smaller (8mm) loops in the earrings using wrapped loops.

- Now it is time to attach the teardrop gemstone beads. Take about 10cm of wire (again there will be some waster) and thread through the top of the teardrop. Bend each wire to the opposite direction as so:

- Take your flat nose pliers and bend one wire to be in line with the teardrop, as so:

- Take the other wire and wrap 2 times around this first wire.

- Trim the tail using flush cutters.
- Because we want these earrings to sit facing forward, bend the wire towards the front of the teardrop.

- Form a loop using round nose pliers, and slide onto one of the bottom loops on the earrings.

- Take the tail and wrap around the stem, up until you reach the first set of wraps.

- If you’re precise, you can cut your wire to exactly meet up with those original wraps and appear seamless. Mine isn’t perfect but it does the job!

- Do this for all four of the bottom loops.

- Now it’s simply time to attach to the earwire. We’ve use sterling silver earwires. With this style, you will need to open up the loop on the earwire slightly, then thread the earring onto the earwire from the other end. The photo says it best!

- Close up the small loop on the earwire to secure the earring dangles in place. And you’re finished!

- Because we are wire wrapping each connection, we will start from the top of these earrings. Cut approx. 10cm of wire (there will be some waste, but it’s easier to work with this amount). Take your larger (12mm) dowel, and form the wire around it.