Why we love this tutorial:
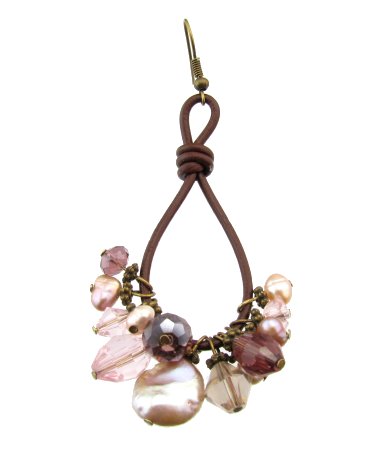
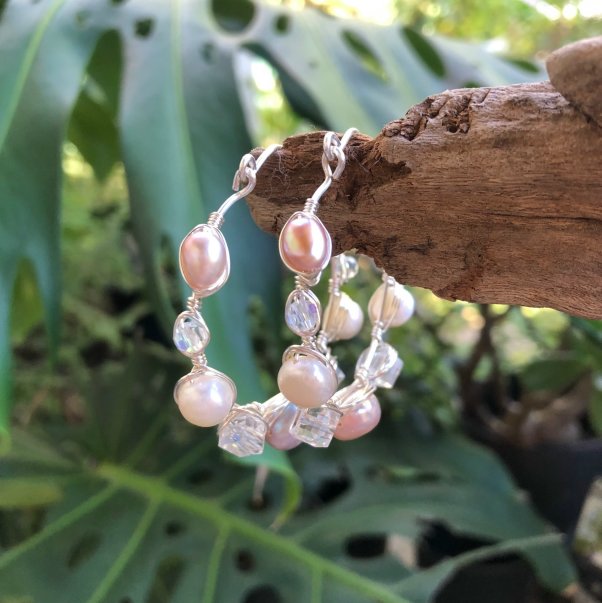
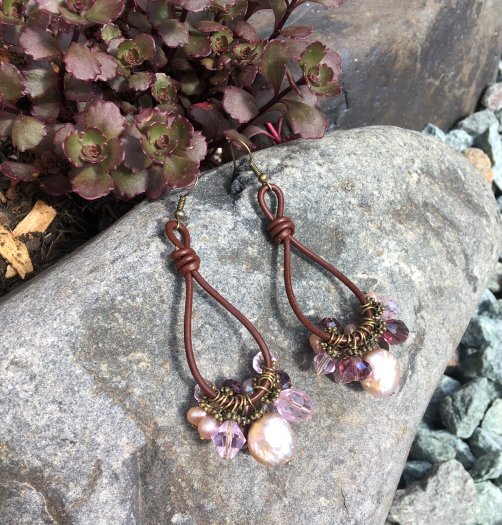
Who doesn’t love the boho look?! We are by no means claiming this design as our own – I have seen versions of these knotted leather earrings everywhere! But they are super easy to make and obviously on trend right now! Plus, they can be made from almost any mixed beads you may have lying around… time to use up some of those odds and ends! We’ve used a mixture of freshwater pearls and crystals, but you could literally use any small beads you like. We’ve made ours quite large for the demonstration (they measure about 6cm tall, not including the earring hook). But these look equally as sweet (perhaps sweeter!) when you make them smaller.
Beads and Materials You’ll Need:
- about 50cm of 2mm or 2.5mm leather or cord (we’ve used 2mm brown leather)
- Earhooks (we’ve used bronze earhooks)
- Approx. 30x Mixed Beads (we’ve used small lilac nugget freshwater pearls, a lilac coin pearl, and mixed mauve crystals).
- Approx. 30x Headpins (we’ve used bronze headpins)
- Approx. 30x 4mm Daisy Spacers
Tools You’ll Need:
Method:
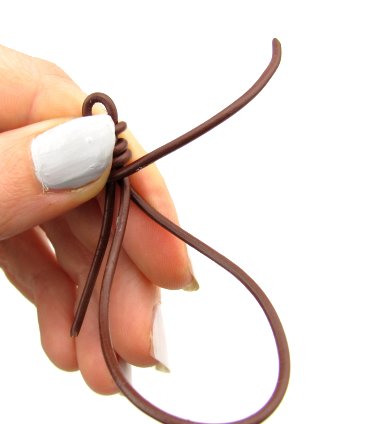
Step 1. Each earring takes about 20cm of leather, but I find it easier to start with more than that and cut it down later. You may have a little more waste, but the earrings will be a lot easier to work with! Fold the leather over, to form the loop at the top.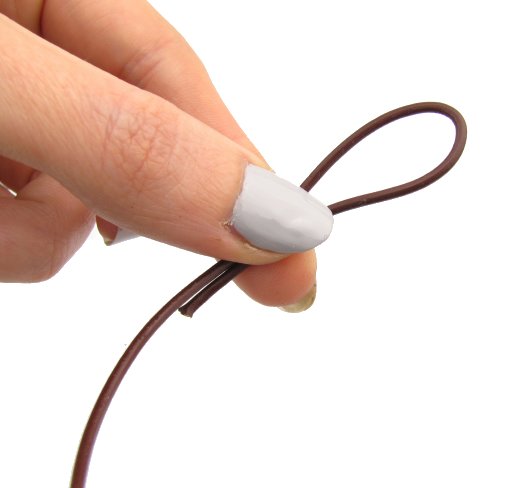
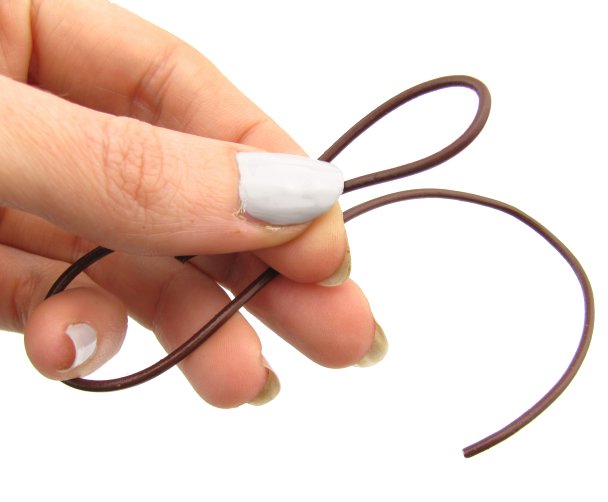
Step 2. Then, make another fold at the bottom to form the large loop of the earring.
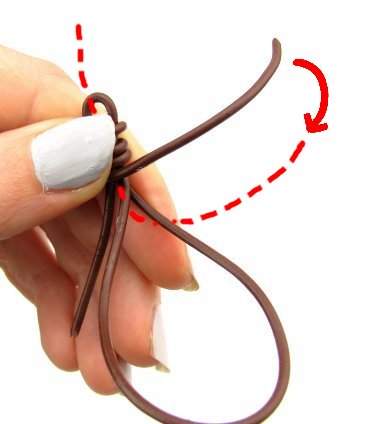
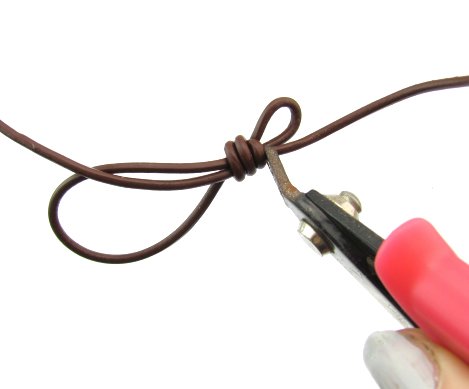
Step 3. Take the tail of the larger loop, and wrap it entirely around the small loop. You will then start to wrap down this smaller loop.

Step 4. Continue to wrap downwards.

Step 5. Continue to wrap downwards, and make three wraps around the smaller loop.
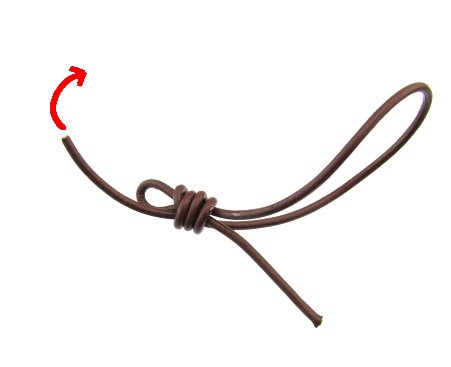
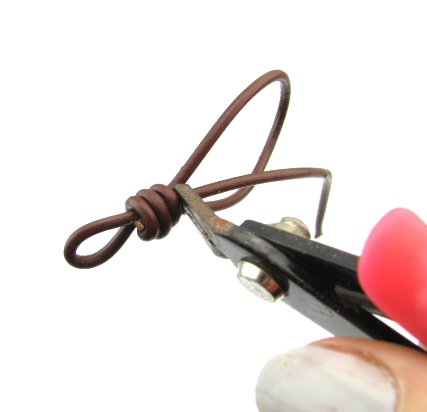
Step 6. Now this step is a little tricky. And tricky to photograph, too! Take the longer tail that you have been wrapping, and pass it up through the center of the wraps you have just completed.
Step 7. Then, pull this loner tail quite tight to form the knot. But!… don’t pull in too hard, as you will want to adjust your loop to the perfect size before you finalise the knot by pulling it as tight as you can.
Step 8. You can pull on the shorter tail to adjust the loop sizing. Once you have got the sizing perfect, pull on the longer tail from before as tight as you can! This will form the knot.
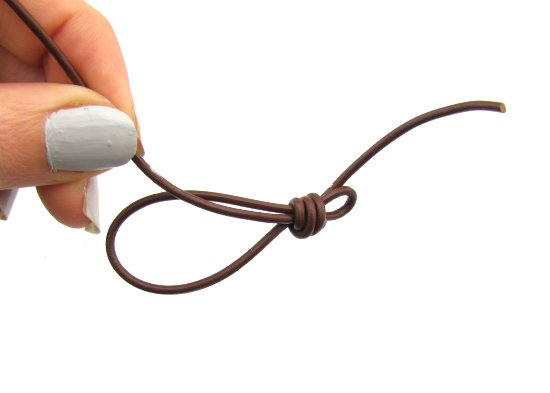
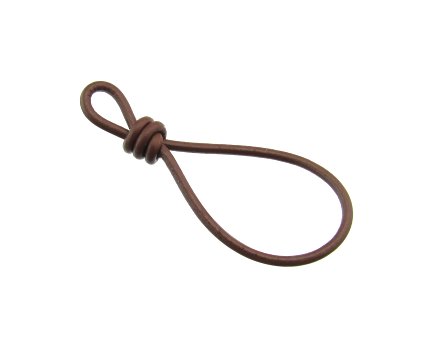
Step 9. Now simply cut off the tails with your flush cutters. It’s definitely a good idea to use some beading glue to secure this knot in place.
The finished loop:
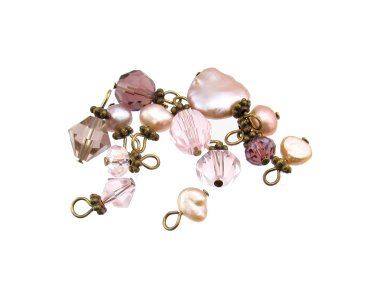
Step 10. Now it’s time to make your dangles! We’ve made about 15 for each earring. Standard procedure for these: just take your headpin, slide on the bead and a daisy spacer, cut the pin with your cutters leaving about 1cm and then form a loop using round nose pliers.
Step 11. Now simply put the earrings together! Open the loops on your dangles and attach them to the leather loop. Then, attach a earhook to the top loop. And you’re done!