Why We Love This Tutorial:
I really wanted to try out our new Guru Beads in a mala-style necklace. This time we took the time to actually knot between each bead! It is time consuming, but it gives such a lovely feel to the finished necklace. We have used some of our 0.65mm knotting cord (I am obsessed with this cord – it is waxed so it won’t fray and holds the knot super well), but you could also use silk or cotton cord. I’ve knotted between each bead, excluding the wood beads (I’ll explain why in the steps!).
Beads and Materials You’ll Need:
- Turquoise Magnesite 6mm round beads (we have used Variegated Turquoise, but any shade of 6mm turquoise would work)
- Green Jade 8mm round beads
- Bronzite 4mm round beads
- 10mm wood beads
- 0.65mm Polyester Micro Macrame Cord (we have used brown coloured cord)
- Clamshells
- Toggle Clasp of your choice (Once again our toggles vary often so please choose a different style if these are no longer available!)
- Tassel (we have used chocolate brown)
- Guru Bead Set (we have used this 9mm set).
- 5mm jump rings
Tools You’ll Need:
- Round Nose Pliers
- Flat Nose Pliers
- Scissors
- Sewing Needle
- Big eye needle
Method:
-
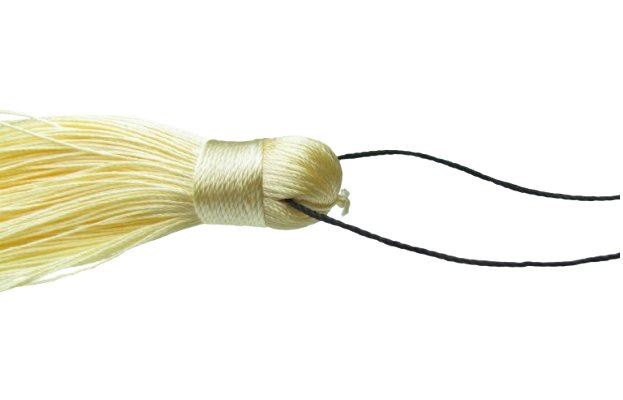
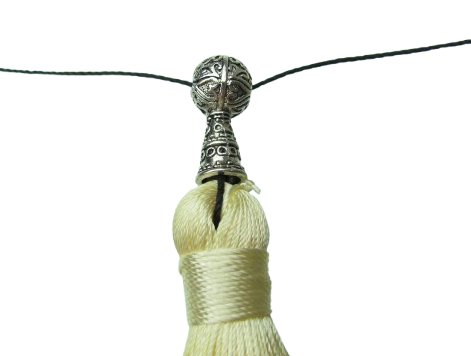
- Start by cutting approx. 2 metres of 0.65mm cord.I find it easiest to start at the middle of the necklace, at the tassel. Take your tassel and cut off the extra string at the top. Then feed your 0.65mm polyester cord through the middle of the top of the tassel (your sewing needle might make this easier!). Note: We have used contrasting coloured cord and tassel in our example pics to demonstrate the technique.
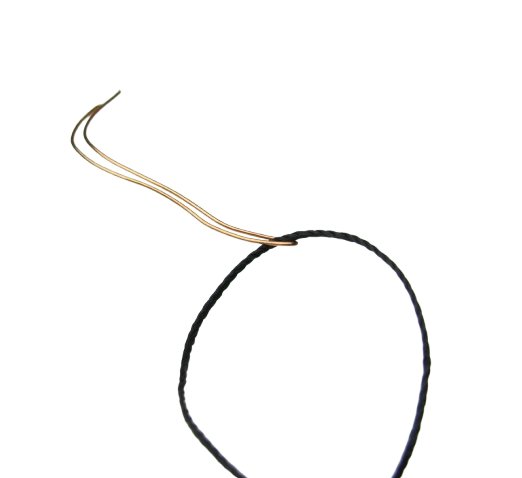
- Put both ends through the cone bead cap. Now you should have two lengths coming out of the cone of about 1 metre each.
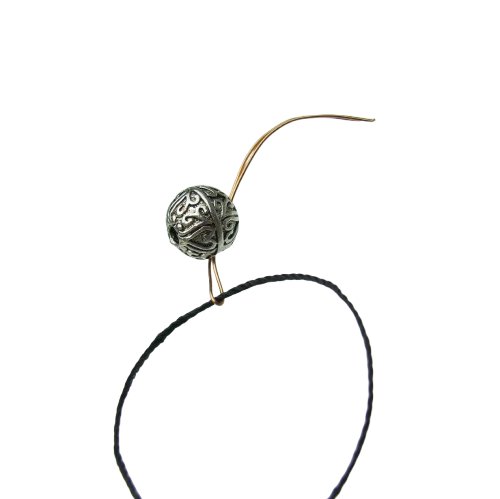
- Use a big eye needle that has been slightly bent to feed each of the 1m metre lengths through the angled holes of the guru bead. (if you do not have a big eye needle, you can use a piece of wire bent in half like I have!).
- Thread each of the sides of the necklace through their respective holes. The images below explains it better (these images just show one of the two holes):
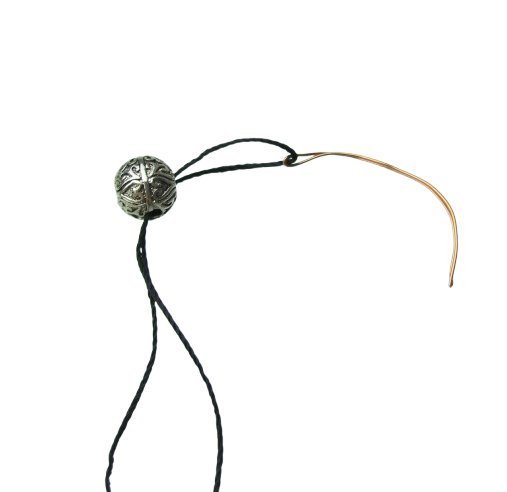
- After threading the cord through each side of the Guru bead, pull the cord tight so that the cap sits closely against the tassel.
- Now it is time to start adding your beads. Add your first bead, and tie a knot after the bead. I have used the technique of tying a knot around a large-ish sewing needle, pulling the needle close to the bead (as close as possible), then pulling out the needle. You may also like to use round nose pliers to push the knot as close to the bead as possible after pulling out the needle.
- The pattern from the Guru bead is: 9x 6mm Turquoise beads – 3x 8mm Jade beads – 7x wood beads (spaced with 4mm bronzite beads*) – 3x 8mm Jade Beads – 16x Turquoise 6mm beads – 3x 8mm Jade beads – 7x wood beads (spaced with 4mm bronzite bead*) – 3x 8mm Jade beads – 7x 6mm Turquoise beads – clamshell – jump ring – clasp. (Repeat for other half of the necklace). *The reason we have spaced the wooden beads with 4mm bronzite is because the holes were too big to allow us to knot between each bead. So we have not knotted the wood & bronzite bead sections.
- Attach a clamshell to each end of the necklace (tie a knot inside the clamshell, and close the clamshell around the knot). Use a jump ring to attach your clasp to the clamshell.
- And, you’re done!

- Start by cutting approx. 2 metres of 0.65mm cord.I find it easiest to start at the middle of the necklace, at the tassel. Take your tassel and cut off the extra string at the top. Then feed your 0.65mm polyester cord through the middle of the top of the tassel (your sewing needle might make this easier!). Note: We have used contrasting coloured cord and tassel in our example pics to demonstrate the technique.