

What you’ll need:
- Approx. 70cm 0.6mm square sterling silver wire.
- Approx. 20cm half round sterling silver wire.
- Cabochon (this one is 25x18mm).
- Masking Tape.
- Ring Stick (or alternative).
- Round nose pliers (or, anything with a fine tip)
- Cutting pliers.
Notes: This tutorial is how I make wire-wrapped pendants. This is not the only way, nor the right way (for you) to do it. It is best to learn the basics, shown here, and adapt your knowledge to your own way of doing it. This is quite a simple design, using the minimum 3 wires (for a border wrap) and may take you anywhere between 30min to 3 hours to make.
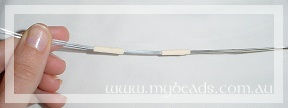
1. Cut your piece of square wire into 3 equal pieces, approx 20cm – 25cm each. Using your flat nose pliers, hold the s wires together in the middle. Note: As you can see in the photo, my pliers are covered with masking tape. I always do this as it stops the pliers marking the wire.

2. Wrap masking tape around the 3 wires either side of your pliers, leaving about a 2cm gap between.
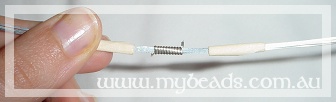
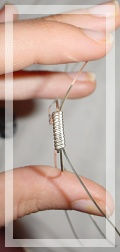
3. Take your half round wire, and start to wrap the 3 wires, between the tape. The tape will hold the wire in place and make this an easy task. Make sure the 3 wires stay sitting side by side, and not bundled together. Use your pliers to flatten the first turn out. This make the rest of this process easier.

4. Be sure to make very tight wraps around the 3 wires. This is important, otherwise your pendant may become lose, and hard to continue making. Turn the small ends of the wire over, so that they are both on the same side of the 3 wires. The flatten them down using your flat nose pliers.
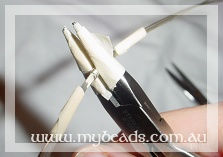
5. After you have finished your wrap (about 1cm long for this size stone), use your flat nose pliers to flatten the whole wrap. The flatter, the better! This way, it will sit closer to the stone with out an ugly gap.
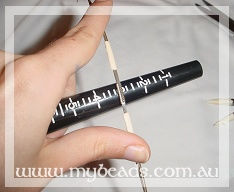
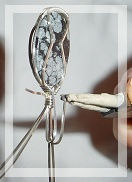
6. Measure the stone up against the wires. Approximate the curve of the stone, and use your ring stick (or something else of this shape) to shape the wires.
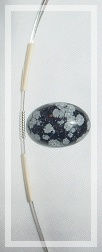
7. You can just shape it up against the stone, however I find the ring stick easier.
8. Cut a small piece of tape, and use it to hold the wire to the stone. Then, shape the wire (doesn’t have to be perfect) around the cab. This will makes things easier in the future.

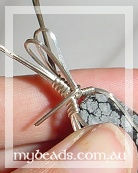
9. Take the stone out of the wire. Then, take the two wires at the back of the pendant (either side at this point) and bend them down so they are horizontal.
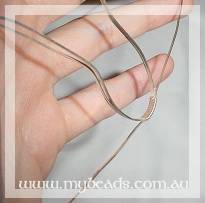
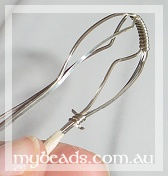
10. Bend the 2 wires up, so that they cross over. Keep the wires as straight as possible.
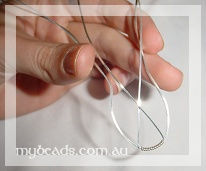
11. Using your flat nose pliers, bend the wires outwards, at just below the place they met when they crossed over. This will form the support at the back of the pendant to hold the cab in securely. This process will be repeated at the front of the pendant as well.
12. When doing this as the front (steps 9-11), you will need to do it slightly differently. Firstly (see photo below) the 2 front wires will need to be pulled slightly away from the pendant, as they will have to accommodate for the fact the cab is domed.
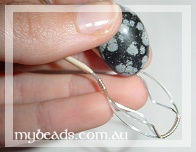
13. See photo below, this is what your pendant should look like currently. (Stone is just in to illustrate the point. However it is useful to continue to put the stone in and out, to measure how the shape is coming along).

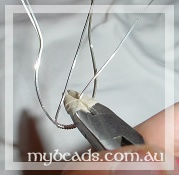
14. Hold the 3 wires with your pliers about two thirds up the length of the stone. Wrap some tape around the 3 wires above this, to hold them tightly in place.

15. Using your half round wire (about 3cm) wrap the 3 wires. Make about 4 wraps here. (see pic). Repeat the previous step and this step on the other side.
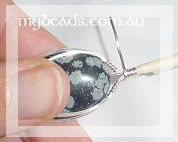
16. Now slip the stone in the ready made frame.
17. Using your flat nose pliers, hold the two sets of 3 wires tightly at the top. This may take a little pressure and fiddling. Try to get the gap at the top as closed as possible, with the pliers as close to the stone as possible. Now wrap some tape around the wires (leaving approx 1cm above the stone) to keep them together and in place for the next step.
18. Cut off about 8cm of half round wire. Wrap this around the 6 wires, leaving about 3 cm of half round wire at the bottom (closest to the stone) end of the wrap (see pic).
19. Now take the 2 back wires, and pull them slightly away from the other 4 wires. Bend them over to form the bail (use something here to guide the shape of the bail. I have used scissors).
20. Press these 2 wires close up against the pendant/stone. Leaving enough room for a reasonable bail. Cut these wires about 3mm below the tiny gap above the stone. Using round nose pliers, curl the ends of the wires inward, toward the stone.
21. Push the small loops into the small gap at the top of the pendant. Then, using the half round wire that was left from the original wrap of the bail, wrap it around these two wires, holding them smugly in place. Keep wrapping the half round wire around until it is all used up, making sure to cut it at the back of the pendant. See pic.
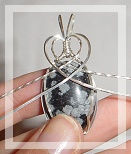
22. Now that the basic pendant is complete, it is up to you to get creative! You have 4 wires remaining, to twist, curl, cut and twirl to create a truly unique pendant.

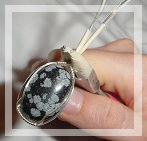
23. Here is what I decided to do with this pendant. Just pull the wires gently, into an arrangement you are happy with. I used a pin vise to twist the inner wires. You could add beads or pearls for a nice effect.
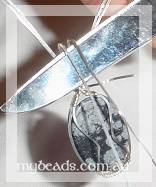
24. Push the wires around the edge of the stone, so that they sit closely. Then cut the wires off about 3mm after the wires at the back of the stone (the ones holding the stone, see pic). Then using round nose pliers, curl them under the back wires, so they can not catch on anything and are not sharp.

25. The finished product!